
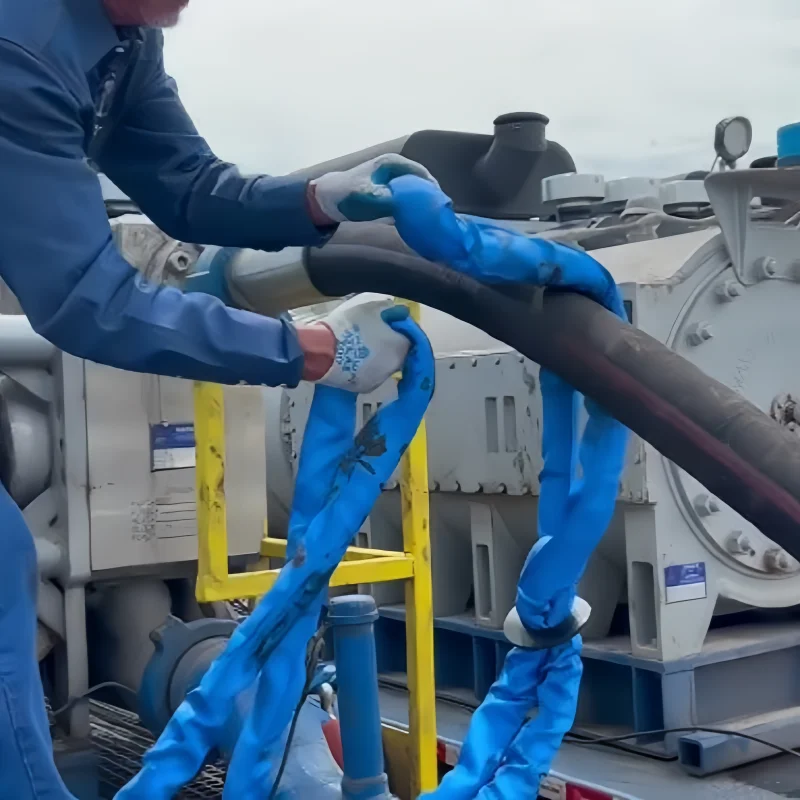
When you manage frac hoses, a quick look at the cover is not enough. You need to know which hose is in front of you, what it has carried, how it has been routed, and whether the complete assembly is still fit for its next job.
That distinction matters because “frac hose” can mean several different products on the same site. A layflat hose moving water at transfer pressure does not have the same construction, failure modes, inspection limits, or repair options as a wire-reinforced high-pressure hose between pumps and manifolds. An acid-service assembly adds another layer of chemical-compatibility risk.
A sound frac hose maintenance program gives you a repeatable way to inspect, clean, handle, store, test, quarantine, and document each assembly. It also gives your crew a clear stopping point: when the hose condition is uncertain, you remove it from service instead of trying to prove it safe during operation.
Key Takeaways
- Start by identifying the hose duty, working-pressure rating, media, temperature limits, end connections, serial number, and manufacturer instructions.
- Inspect the complete assembly before use, watch it from outside the exclusion zone during operation, and inspect it again after cleaning.
- Remove a hose from service for leaks, bulges, blisters, kinks, crushing, exposed reinforcement, coupling movement, severe corrosion, heat damage, or lost traceability.
- Keep bends within the stated minimum bend radius, prevent twist, support heavy ends, and protect the hose from dragging, impact, and vehicle traffic.
- Use a cleaning method that is compatible with the tube material and the fluid residue. High-pressure water is not a universal answer.
- Treat proof testing as a controlled technical procedure, not a daily visual-inspection substitute. Use the test method, pressure, hold time, and interval specified for the exact assembly and service.
- Build replacement intervals from manufacturer guidance, service severity, inspection history, and failure data. A universal “replace every X years” rule is not reliable for every frac hose.
First, Identify Which Frac Hose You Are Maintaining
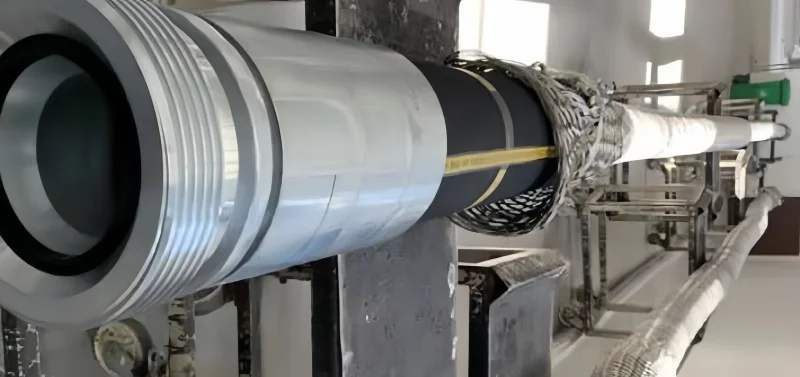
Before you clean, test, or repair anything, read the layline, tag, or data plate and match it to your hose register. If the identification is missing or conflicts with your records, quarantine the assembly until the manufacturer or another authorized technical authority provides a written disposition.
You will usually be dealing with one of three hose paths:
Layflat Frac Water-Transfer Hose
You use this hose for high-volume movement of fresh water, produced water, or another compatible fluid. Your maintenance concerns often include cover abrasion, cuts, pinholes, coupling damage, contamination, kinking during deployment, and damage from vehicles or rough terrain. Some manufacturers permit defined repairs to certain layflat products, but only within their written repair limits.
Reinforced High-Pressure Frac Hose
You use this assembly where the line must carry high-pressure fracturing fluid between pumps, manifolds, or other pressure-system equipment. The hose body, reinforcement, end fittings, and hose-to-fitting interfaces form one pressure boundary. A body leak, bulge, exposed reinforcement, or fitting movement is a removal-from-service condition, not a field-patch opportunity.
Acid-Service Frac Hose
You select this hose for a defined acid or chemical recipe. Compatibility depends on more than the name of the acid. You need concentration, additives, fluid base, solids, temperature, exposure time, pressure, and cleaning chemistry. If hydrogen sulfide is present, disclose the H2S conditions separately; acid resistance alone does not establish sour-service suitability.
Once you identify the hose family, confirm the maximum working pressure, temperature range, minimum bend radius, fluid compatibility, overall length, and both end connections. Proof or burst pressure is not an operating rating.
Build a Maintenance Schedule Around Risk
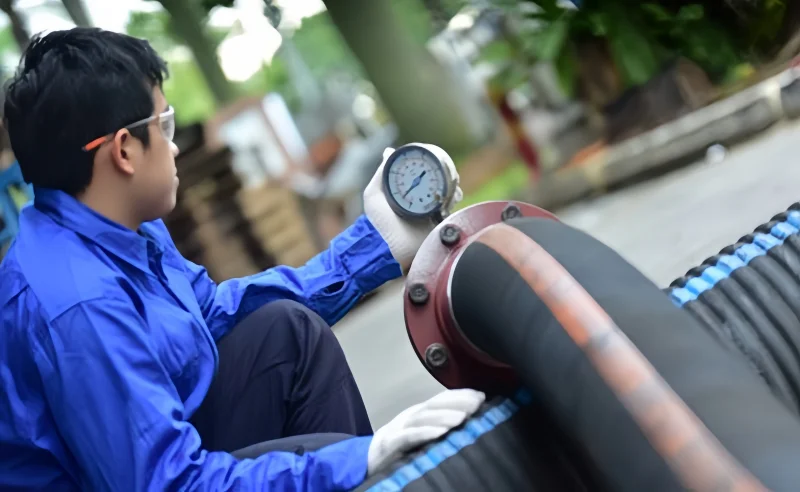
Your inspection frequency should reflect how hard the assembly works and what would happen if it failed. A hose in continuous abrasive slurry service, severe cold, frequent pressure cycling, or a critical high-pressure position deserves more attention than a lightly used transfer hose in a protected run.
Use the following schedule as a planning framework, then align it with the hose manufacturer, equipment owner, site procedures, and the applicable standard:
Before Each Deployment or Shift
- Match the hose ID to the hose register and intended service.
- Confirm the working-pressure and temperature ratings suit the job.
- Check the full exterior, end fittings, seals, restraints, supports, and route.
- Verify the hose is not twisted and will remain within its minimum bend radius.
- Confirm guards, ramps, and exclusion-zone controls are in place.
During Operation
- Monitor pressure, temperature, flow, vibration, and unusual movement from a safe position.
- Look for new seepage, cover swelling, hose growth, coupling movement, abnormal noise, or a change in the route.
- Stop the operation under your site procedure if the condition changes or a leak is suspected.
After Use and Cleaning
- Drain and clean the hose under the approved procedure.
- Inspect the cover again, because dirt or fluid residue may have hidden damage.
- Examine accessible ends and the bore for erosion, cuts, blistering, or lining separation.
- Record the condition, service media, operating hours or cycles, and any abnormal event.
Planned Detailed Inspection and Testing
Set the interval from service severity, prior findings, manufacturer recommendations, owner requirements, and the governing standard. Shorten it after pressure excursions, chemical upsets, crushing, excessive bending, fire or heat exposure, unusual vibration, or a change in service. Do not wait for the next calendar date when an abnormal event has already given you a reason to inspect.
Follow a Safe Frac Hose Inspection Procedure
1. Isolate the Line and Verify Zero Stored Energy
Before anyone touches the assembly, stop the equipment, isolate all energy sources, lock out or tag out as required, depressurize, drain, and verify zero pressure. Remember that trapped fluid can remain behind a closed valve or in a low point.
Never use your hand to locate a pinhole leak. A fine jet can be hard to see and can penetrate skin. Treat any suspected high-pressure injection injury as an immediate medical emergency, even when the wound looks small.
2. Check Identification and Service History
Confirm the manufacturer, model or hose family, serial or asset number, size, overall length, working pressure, temperature range, media compatibility, manufacture or commissioning date, end connections, and previous inspection or test status.
Look for gaps in the record. An unknown pressure excursion, undocumented chemical exposure, unapproved repair, or missing test record can be as important as visible damage. If you cannot establish the hose history, do not quietly return it to a critical service.
3. Inspect the Entire Exterior
Clean enough of the cover to see its true condition, then examine the full length under good lighting. Flex only where the manufacturer permits and never force a cold or stiff hose into a tight bend.
Look for:
- Cuts, gouges, punctures, cracks, or weather checking.
- Abrasion that has removed the cover or exposed reinforcement.
- Bulges, blisters, soft spots, hard spots, or local changes in diameter.
- Kinks, flattened areas, crushing, permanent twist, or ovality.
- Heat, fire, electrical-arc, UV, ozone, or chemical-attack damage.
- Rust staining, broken wires, or other signs of reinforcement deterioration.
- Leaks, wet spots, dried residue, or a spray pattern near the hose body or ends.
- Loose, displaced, or damaged guards, armor, sleeves, and restraints.
Do not cover active damage with a new sleeve. A protective sleeve can reduce future abrasion only when the underlying hose has already passed inspection and the manufacturer accepts the protection method.
4. Inspect the Bore When It Is Accessible
The outer cover can look sound while abrasive slurry, chemicals, or decompression has damaged the tube. After the hose is safely drained and cleaned, inspect accessible portions of the bore. Use a borescope or another approved method when the service, hose design, and inspection plan call for it.
Watch for tube cuts, scoring, erosion, blistering, lifting, delamination, swelling, embedded solids, corrosion products, or an obstruction. Compare repeated inspections at the same locations whenever possible. Trend data is more useful than a collection of unrelated photographs.
5. Inspect Fittings and Connections
Check both ends as part of the assembly, not as separate hardware. Look for corrosion, cracks, impact damage, worn threads, damaged seal faces, loose components, leakage, and any sign that a fitting has slipped, rotated, or pulled away from its original position.
Support heavy end fittings so their weight does not force a sharp bend at the coupling. Confirm that mating components match in size, pressure class, seal type, material, and service. Similar-looking hammer unions or flanges are not automatically interchangeable.
Protect the Hose Through Better Routing and Handling
Many failures begin with an installation problem that repeats every shift. If you replace the hose without correcting the route, the next assembly can fail in the same place.
Keep the hose within its stated minimum bend radius and allow the bend to begin away from the end fitting. Do not pull it sideways from a rigid connection. Prevent twist during connection and pressurization; the printed layline can help you see whether the hose has rotated.
Use approved supports, lifting points, bend restrictors, guards, bridges, or ramps where the route needs them. Do not lift a heavy assembly by the hose body unless the manufacturer provides a defined lifting method. Keep forklifts, trucks, and tracked equipment off unprotected hose runs.
Separate the hose from sharp edges, hot surfaces, moving equipment, and other hoses that can rub against it. Where movement is expected, leave enough length for that movement without creating slack that can snag, whip, or form a tight bend.
Clean Without Damaging the Tube
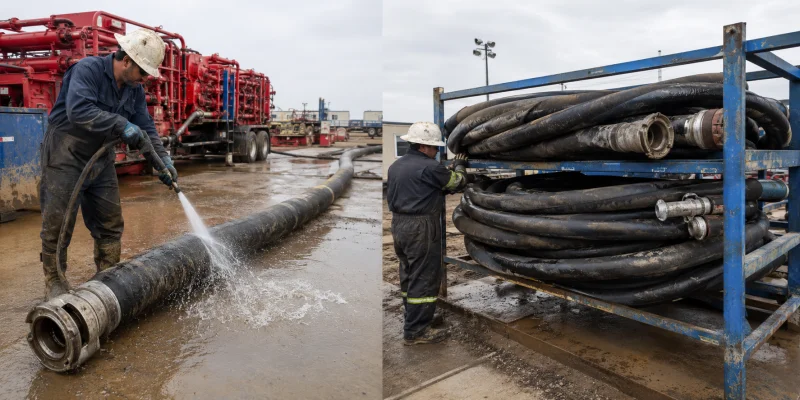
Your cleaning method must suit both the hose material and what the hose carried. Start by identifying the residual fluid and reviewing its safety data, disposal requirements, and the manufacturer’s cleaning instructions.
Use a compatible flushing medium at an approved temperature and pressure. Control the discharge, collect contaminated wash fluid, and continue until your acceptance criterion is met. That criterion may involve visual cleanliness, conductivity, pH, contamination level, or another project-specific measure.
Avoid three common mistakes:
- Do not assume high-pressure water is safe for every hose. The jet, temperature, or cleaning pressure can damage some linings or drive contamination deeper into a defect.
- Do not use a solvent or chemical cleaner until you confirm compatibility with the tube, cover, seals, and end fittings.
- Do not close the ends while the hose is still wet if trapped moisture can cause corrosion, microbial growth, freezing, or contamination.
After cleaning, drain and dry the assembly as required, inspect it, and cap the ends with clean, compatible covers.
Store Frac Hoses So They Are Ready for the Next Job
Store cleaned and identified hoses in a cool, dry, ventilated area away from direct sunlight, weather, welding activity, hot equipment, and ozone-generating electrical equipment. Keep acids, solvents, fuels, and other chemicals away unless the storage plan specifically controls them.
Use racks, reels, pallets, or cradles that support the hose without sharp contact points. Maintain the storage bend radius. Do not hang a heavy assembly from one end, stack equipment on it, or compress it into a smaller coil simply to save floor space.
Cap open ends against dirt, moisture, insects, and foreign objects. Keep tags readable and separate quarantined hose from serviceable inventory. First-in, first-out stock rotation is helpful, but condition and documented service suitability still decide whether an assembly can return to work.
Inspect a stored hose before redeployment, especially after long storage or cold exposure. Bring a cold hose into its approved handling range before you uncoil or bend it.
Use Pressure Testing as a Controlled Decision Point
A pressure test can reveal leakage or loss of integrity under a defined load. It cannot erase visible damage, restore traceability, or guarantee how much service life remains.
Only trained personnel should test a hose to a written procedure for the exact assembly. The procedure should define the test medium, test pressure, pressure ramp, hold time, temperature, acceptance criteria, instrumentation accuracy, end restraints, exclusion zone, and record format. Use a controlled test area and keep personnel away from the potential line of fire.
Hydrostatic testing is often preferred over pneumatic testing because compressed gas stores much more energy, but you must follow the specified method rather than choose one informally. Remove trapped air where the hydrostatic procedure requires it. Never improvise a test pressure from a generic multiple found online, and never use burst pressure as a proof-test target.
Inspect the hose before testing. If it already has a removal-from-service defect, testing it may add risk without answering a useful question. After the test, inspect again and record the actual pressure trace, hold time, fluid, temperature, equipment IDs, result, date, and person responsible.
Know When to Remove a Frac Hose From Service
Quarantine the assembly when you find any of the following conditions:
- A leak, pinhole, or unexplained wet area.
- Exposed, broken, displaced, or corroded reinforcement.
- A bulge, blister, tube separation, or local change in diameter.
- A kink, crushed section, flat spot, or permanent deformation.
- A cut, gouge, burn, or abrasion beyond the manufacturer’s limit.
- A cracked, badly corroded, worn, or leaking end fitting.
- Fitting slip, rotation, or separation from the hose body.
- Damage from fire, excessive heat, electrical arcing, or incompatible chemicals.
- An unreadable or missing ID when rating and service history cannot be verified.
- A failed inspection or pressure test.
- A proposed service outside the documented pressure, temperature, media, bend, or connection limits.
Tag the hose so it cannot be selected by mistake, move it to a controlled quarantine area, and record the reason. The next decision should be replacement, manufacturer-authorized evaluation, or an approved repair path for that exact hose type.
Repair Only When the Hose Design and Manufacturer Allow It
Some layflat water-transfer hoses may be repairable with a manufacturer-approved patch, sleeve, or splice procedure. The allowable location, defect size, materials, technician qualification, curing process, and post-repair test must all come from the applicable written instruction.
Do not field-patch the pressure body of a reinforced high-pressure frac hose. Do not cut and re-crimp a used assembly unless the original manufacturer has expressly authorized that work for the exact design and has defined the inspection, assembly, test, marking, and documentation requirements.
When a repair is permitted, record the original defect, its location, the repair method and materials, the technician, the post-repair inspection and test results, and the revised service status. A repair without traceability creates another maintenance problem.
Keep a Hose Register That Helps You Prevent Repeat Failures
Your records should let a supervisor understand the assembly without walking to the storage rack. For each hose, record:
- Asset ID, serial number, manufacturer, and hose family.
- Hose duty, size, length, working pressure, temperature range, and minimum bend radius.
- Tube or liner, cover, reinforcement, and end-connection details when available.
- Approved media and known chemical exposures.
- Commissioning date, storage periods, operating hours, pressure cycles, or job count where tracked.
- Inspection dates, observations, measurements, photographs, and disposition.
- Cleaning method and any abnormal residue or contamination.
- Test procedure, equipment, pressure trace, result, and next due date.
- Repair, replacement, or retirement decision and the person who approved it.
- Failure location, likely cause, and corrective action.
Review the register for failure patterns. If several hoses abrade at the same support, move or redesign the support. If end damage repeats, check alignment and fitting support. If tube wear is accelerating, review the fluid recipe, solids, velocity, bends, and cleaning method. Good records turn maintenance from a calendar task into a feedback loop.
Copy-Ready Frac Hose Maintenance Checklist
Before you release a hose for service, confirm:
- The hose ID and service history are readable and current.
- The hose family matches the intended duty.
- Working pressure, temperature, fluid, and connections match the job.
- The full cover is free from rejectable cuts, abrasion, bulges, blisters, kinks, crushing, and heat or chemical damage.
- Reinforcement is not exposed, broken, displaced, or corroded.
- End fittings and seals are clean, compatible, secure, and undamaged.
- The route stays within the minimum bend radius and does not twist the hose.
- Heavy ends are supported and road crossings or abrasion points are protected.
- Required restraints, guards, barriers, and exclusion-zone controls are in place.
- Cleaning, inspection, and test records meet the current site and manufacturer requirements.
- Any doubt has been resolved in writing; otherwise, the hose remains quarantined.
Make Frac Hose Maintenance Part of the Operating Plan
The best maintenance work happens before the line is pressurized. You choose the correct hose for the duty, route it without twist or strain, protect it from predictable damage, and give your crew clear inspection and rejection criteria.
If you are building or updating a frac hose maintenance plan, send AlienFrac the hose duty, fluid composition, solids, working and surge pressure, fluid and ambient temperature, size, length, end connections, routing conditions, and required inspection or test documents. You will get a more useful technical review when the request describes the complete service rather than asking for a generic maintenance interval.
Frac Hose Maintenance FAQs
How often should you inspect a frac hose?
You should check the assembly before deployment or each shift, monitor it during operation from a safe location, and inspect it after use and cleaning. Set detailed-inspection and test intervals from the manufacturer’s instructions, service severity, site requirements, applicable standards, and your own condition history. Increase the frequency after any abnormal event.
Can you use high-pressure water to clean every frac hose?
No. Use only a cleaning method compatible with the exact tube, cover, seals, fittings, and fluid residue. Confirm the flushing medium, temperature, pressure, and waste-control method before cleaning.
Can you repair a high-pressure frac hose in the field?
You should not patch a leak or structural defect in the pressure body of a reinforced high-pressure assembly. Isolate and quarantine it. Repair or re-ending is acceptable only when the original manufacturer provides written authorization and a controlled procedure for that exact hose.
What is the most common sign that a hose should be replaced?
There is no single sign. Remove the hose for leaks, exposed reinforcement, bulges, blisters, kinks, crushing, severe abrasion, fitting movement, significant corrosion, heat or chemical damage, failed testing, or lost identification. Follow the manufacturer’s rejection criteria where they are more specific.
Does passing a pressure test make a damaged hose safe?
No. A test only shows how the assembly behaved under the stated test conditions. It does not cancel a visual reject condition or prove remaining service life. Inspect before and after testing and apply all rejection criteria.
How long does a frac hose last?
Service life depends on the hose design, fluid, solids, pressure cycles, temperature, routing, handling, cleaning, storage, and abnormal events. Use manufacturer limits and your documented inspection history to set replacement intervals. Do not rely on a universal age alone.