
You need to perform hammer union installation with precision to ensure operational safety and equipment reliability in oilfield environments. Alienfrac stands out as a trusted provider of high-quality hammer unions designed for demanding, high-pressure applications.
Hammer unions play a critical role in connecting pipes and hoses, offering leak-proof performance under extreme conditions. Proper installation and regular inspection help prevent leaks, equipment failure, and environmental hazards. The table below shows how correct installation impacts safety and longevity:
| Description | Impact |
|---|---|
| Correct installation reduces the risk of leaks and blowouts | Enhances safety and equipment reliability |
| Regular inspection prevents sudden failures | Maintains integrity and reduces environmental contamination risk |
| API compliance ensures reliability | Reduces downtime and supports standardized practices |
| Damaged sealing surfaces cause fluid leaks | Highlights the need for proper handling to avoid operational risks |
Key Takeaways
- Proper installation of hammer unions prevents leaks and enhances safety in oilfield operations.
- Regular inspections and maintenance extend the lifespan of hammer unions and reduce the risk of equipment failure.
- Always use the correct tools and personal protective equipment to ensure safe and efficient installation.
- Select the right type of hammer union based on pressure ratings to ensure compatibility and performance.
- Implement a routine for leak detection to maintain system integrity and avoid costly downtime.
Hammer Unions Overview
What Are Hammer Unions?
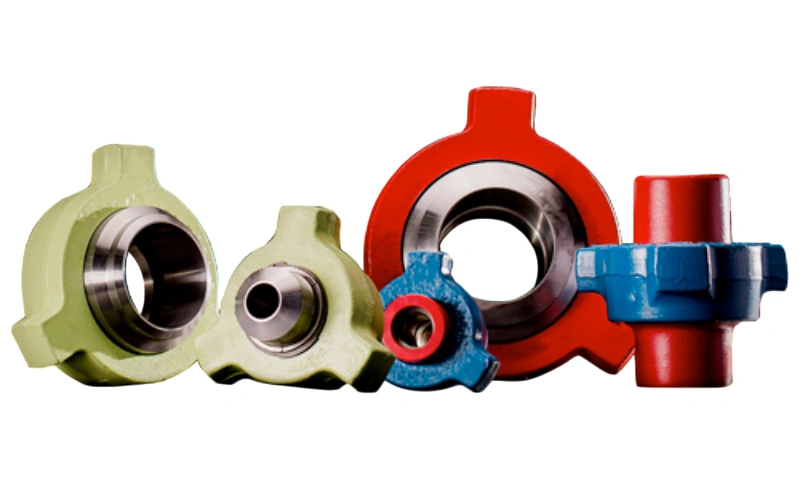
You encounter hammer unions every day in oilfield operations. These essential connectors join pipes and hoses, creating secure and leak-proof joints that withstand high pressure.
Hammer unions allow you to assemble and disassemble piping quickly, which reduces downtime and increases efficiency. You rely on hammer unions for drilling, cementing, and fracturing tasks. Their rugged design ensures that connections stay tight, even in harsh environments.
Hammer unions come in several types, each with a specific pressure rating. You must select the right type for your application to ensure safety and performance. The table below shows two common types and their pressure ratings:
| Hammer Union Type | Pressure Rating |
|---|---|
| 1002 | Up to 10,000 PSI |
| 1502 | Up to 15,000 PSI |
You see that hammer unions can handle extreme pressures. This capability makes them vital for oil and gas operations. You benefit from their quick installation and removal, which helps you maintain productivity on site.
Alienfrac Hammer Union Features
When you choose Alienfrac hammer unions, you invest in quality and innovation. Alienfrac designs hammer unions to meet the highest industry standards. You get products certified by DNV MED, CCS, ABS, and API. These certifications show that Alienfrac values safety and reliability.
Alienfrac hammer unions feature precision-machined sealing surfaces. You achieve leak-proof connections every time. The unions use high-strength steel and corrosion-resistant alloys. This construction gives you a long service life, even in tough conditions.
You can select from a wide range of sizes and pressure ratings, so you always find the right fit for your needs.
Alienfrac’s commitment to innovation means you get advanced manufacturing and strict quality control. You trust these hammer unions to perform under pressure. You also benefit from color-coded identification, which helps you match the right union to the right job.
With Alienfrac, you ensure safe, efficient, and reliable connections in every operation.
Hammer Union Installation Preparation
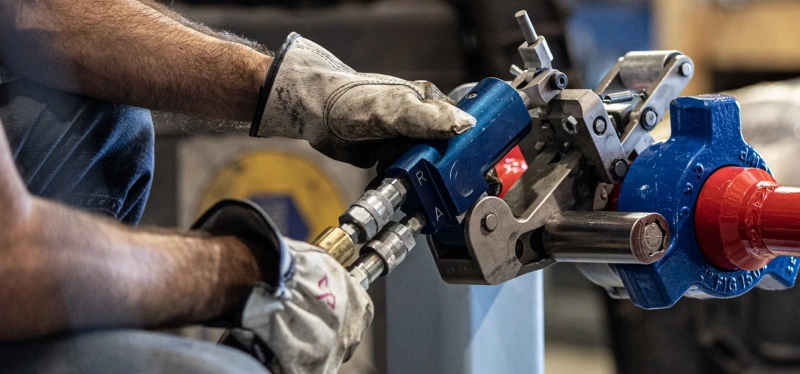
Tools and Equipment Needed
You need the right tools and equipment to install hammer unions efficiently. Using proper tools helps you achieve a secure fit and reduces the risk of damage. Before you begin, gather the following items:
- Adjustable pipe wrenches
- Hydraulic torque wrenches
- Impact wrenches
- Safety clamps
- Pipe alignment tools
- Lubrication products (such as anti-seize compound)
You should also prepare personal protective equipment for every installation. This includes:
- Hard hats
- Gloves
- Eye protection
- Steel-toed boots
These items protect you from common hazards on the job site. Alienfrac recommends always using high-quality tools and PPE to maintain safety and performance standards.
Safety Precautions
You must follow strict safety protocols during hammer union installation. Start by selecting the correct type of hammer union for your application. This step ensures compatibility and prevents connection failures.
Apply the correct torque with your wrench to avoid leaks and maintain a tight seal. Always wear your PPE, including hard hats, gloves, and eye protection, to reduce the risk of injury.
Regular inspections help you spot wear and tear before it becomes a problem. Handle all components carefully to maintain safety and efficiency. You should also have an emergency response plan and practice regular drills with your team. These steps keep everyone prepared for unexpected situations.
Tip: Alienfrac prioritizes safety in every product design and manufacturing process. You can trust Alienfrac hammer unions to support your safety goals on site.
By following these guidelines, you create a safer work environment and protect both your team and your equipment.
Step-by-Step Hammer Union Installation
Inspecting and Cleaning Components
You must begin every hammer union installation with a thorough inspection and cleaning process. This step ensures the reliability of drilling hammer union fittings and prevents failures in high-pressure connections. Use the following table to guide your inspection and cleaning routine:
| Procedure Type | Description |
|---|---|
| Regular Inspections | Establish a consistent inspection frequency to prevent unexpected failures and ensure safety. |
| Inspection Tools | Use calipers and gauges to detect deviations from standard measurements. |
| Identifying Wear Signs | Examine for uneven wear, metal shavings, or corrosion to assess the union’s condition. |
| Cleaning Techniques | Start with pressure washing and use safe solvents for stubborn grime to maintain functionality. |
Contamination can compromise the sealing surfaces of emergency hammer unions. You should always remove debris with a wire brush and apply solvent if necessary. Clean sealing surfaces guarantee that the union’s metal-to-metal or elastomeric gaskets function as designed.
This process protects internal components from dirt, sand, and corrosive agents, which can lead to leaks or equipment damage.
Tip: Never skip the cleaning step. Even small particles can cause leaks or reduce the lifespan of drilling hammer union fittings.
Aligning and Connecting Fittings
Proper alignment is critical for successful hammer union installation. You must match the size and thread configuration of each component to the application’s pressure rating. Follow these installation techniques for the best results:
- Clean all sealing surfaces and threads on the drilling hammer union fittings.
- Check the size and thread configuration to confirm compatibility with the system’s pressure ratings.
- Align the male and female halves of the emergency hammer unions precisely.
- Use pipe alignment tools to ensure the fittings are straight and level.
- Connect the fittings by hand before using tools to avoid cross-threading.
Misalignment during installation can create safety hazards, such as catastrophic failures or leaks. You may also experience non-productive time due to excessive vibration or cracks from over-fatigue.
Always verify that the pressure rating, size, and thread configuration match the requirements for your drilling hammer union fittings.
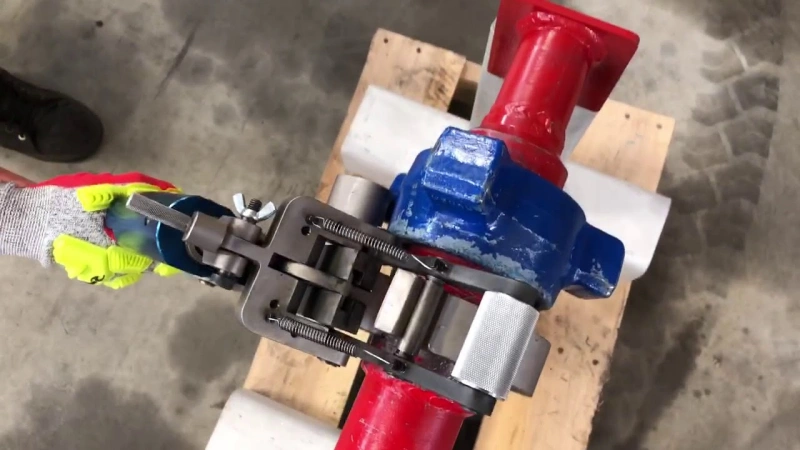
Tightening and Sealing
Once you have aligned the fittings, you need to secure the connection. Apply a thin layer of anti-seize compound to the threads and sealing surfaces. This step prevents galling and ensures smooth assembly. Use the following installation techniques:
- Tighten the wing nut by hand until it contacts the sealing surfaces.
- Use a hammer or hydraulic torque wrench to finish tightening, following the manufacturer’s torque specifications.
- Avoid over-tightening, which can damage threads or deform sealing surfaces.
- Confirm that the emergency hammer unions are seated evenly and that the sealing surfaces are in full contact.
You must always check the pressure ratings before final tightening. This practice ensures that the drilling hammer union fittings can handle the expected loads. Emergency hammer unions rely on precise sealing surfaces to maintain leak-proof performance in high-pressure connections.
Final Safety Checks
After completing the hammer union installation, you must perform several safety checks. These steps verify the integrity of the connection and confirm that the drilling hammer union fittings meet operational standards. Use the table below to guide your final inspection:
| Test Type | Description |
|---|---|
| Hydrostatic test | Tests the union’s ability to withstand pressure. |
| Sealing test | Ensures no leaks occur under pressure. |
| Visual & dimensional check | Checks for physical defects and measurements. |
| Batch-specific test report | Provides documentation for each production batch. |
Inspect all sealing surfaces for signs of leaks or misalignment. Confirm that the emergency hammer unions match the required pressure rating and size and thread configuration. Document your results and keep records for future reference.
Note: Consistent safety checks help you avoid costly downtime and protect your team from unexpected failures.
By following these installation procedures, you ensure that every hammer union installation meets industry standards for safety and performance. You also extend the service life of your drilling hammer union fittings and maintain the reliability of your high-pressure connections.
Troubleshooting and Maintenance
Common Installation Mistakes
You often encounter errors during hammer union installation that can compromise safety and performance. The table below highlights frequent mistakes and practical prevention methods. Review these steps before working with fittings or box and pin unions to ensure reliable connections.
| Common Mistake | Prevention Method |
|---|---|
| Incorrect size selection | Verify size compatibility with the piping system to avoid leaks and failures. |
| Poor thread alignment | Clean threads and engage them carefully to prevent damage. |
| Neglecting seal inspection | Examine seals for wear and compatibility before installation. |
| Over-tightening issues | Use a torque wrench to apply the correct amount of force without exceeding limits. |
| Ignoring pressure ratings | Review installation guidelines to ensure the right pressure ratings are selected. |
| Lack of regular maintenance | Establish a maintenance schedule for regular inspections to catch wear and tear early. |
Tip: Always check fittings and connections for proper alignment and pressure rating before tightening. This practice improves safety and extends the service life of your box and pin unions.
Leak Detection and Solutions
You must detect leaks quickly to maintain safety and prevent costly downtime. Use these methods to inspect fittings and connections:
- Regularly check for signs of wear or damage on unions.
- Look for visible cracks, corrosion, or irregularities around connection points.
- Apply a soap solution to suspected areas; bubbles will form if there’s a leak.
- Use electronic detectors that sense escaping gases or fluids for accurate leak assessment.
- Look closely at the union and threaded connections for visible leaks.
- Trace around the joint with your fingers to feel for moisture.
- Wrap a dry paper towel around the joint to detect small leaks; moisture will create a damp spot.
- Mix dish soap and water, apply it to the union nut and threaded joints; bubbles will indicate a leak.
Note: Early leak detection protects fittings and ensures safety in high-pressure environments.
Maintenance Tips
You maintain optimal performance by following routine maintenance practices for hammer unions and fittings. The table below outlines essential steps:
| Maintenance Practice | Description |
|---|---|
| Regular Inspection Protocols | Conduct visual inspections before each use for cover damage. |
| Examine end fittings for thread damage or leakage. | |
| Perform pressure testing at regular intervals. | |
| Inspect the inner tube for erosion or damage when possible. | |
| Handling and Storage | Store on racks or reels to prevent damage and kinking. |
| Avoid exposure to petroleum products or chemicals when not in use. | |
| Protect from extended UV exposure during storage. | |
| Clean thoroughly between different media types. | |
| Use proper lifting techniques to prevent cover damage. |
- Establish a maintenance schedule that aligns with your operational needs.
- Conduct regular inspections to identify signs of corrosion, cracks, or deformation.
- Ensure all parts fit properly and operate smoothly without resistance.
Callout: Consistent maintenance of fittings and connections increases reliability and safety. Alienfrac recommends routine inspections and proper storage to maximize the lifespan of your hammer unions.
Conclusion
You ensure safe and effective hammer union installation by following proper use and installation procedures. Always inspect components, apply anti-seize compound, and control torque levels. Review technical specifications for compatibility and pressure ratings.
Alienfrac delivers reliable solutions that meet industry standards. The table below highlights key takeaways for maintaining safety and performance:
| Key Takeaway | Description |
|---|---|
| Assess Material Compatibility | Confirm materials withstand field conditions to prevent wear and failure. |
| Handle Temperature Extremes | Use strategies to protect unions from temperature-related damage. |
| Regular Maintenance Practices | Schedule preventive maintenance and lubrication. |
| Identify Leaks | Inspect visually and use leak detection methods to maintain system integrity. |
Stay updated by inspecting unions before use, replacing seals regularly, and avoiding mixing components from different manufacturers. Access training resources and follow safety protocols to enhance your skills and protect your team.
FAQ
How do you choose the correct hammer union for your application?
You check the pressure rating, size, and material compatibility. Review the color code and figure type. Alienfrac offers a range of unions for different environments. Always match the union to your operational requirements.
What maintenance steps should you follow for hammer unions?
You inspect unions regularly for wear, corrosion, and leaks. Clean sealing surfaces and threads. Store unions properly to prevent damage. Schedule pressure tests and replace worn seals as needed.
Can you use Alienfrac hammer unions in sour gas environments?
Yes, you can use specific Alienfrac hammer unions designed for sour gas applications. These unions feature corrosion-resistant materials and meet industry standards for safety.
What tools do you need for hammer union installation?
You need pipe wrenches, torque wrenches, alignment tools, anti-seize compound, and personal protective equipment. Use the correct tools to ensure a secure and leak-proof connection.
How do you detect leaks after installation?
You apply a soap solution to the joint. Bubbles indicate leaks. You can also use electronic detectors or wrap a dry towel around the connection to check for moisture.